Introduction – First Alert Smoke Alarm
The First Alert Smoke Alarm is a really important safety device for your home. It’s like having a smart guard that warns you when there’s a chance of fire. This alarm is reliable and easy to use, ensuring you and your family can stay safe.
What is the First Alert Smoke Alarm?
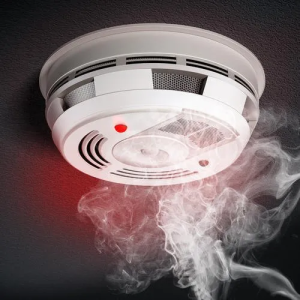
The First Alert Smoke Alarm is a device in your house that detects smoke. When it senses smoke, it makes a loud sound to warn you so you can be safe in case of a fire. Some alarms can connect with each other. If one alarm detects smoke, all the others will sound, too. This feature is great for keeping everyone in the house aware and safe.
How to Use and Maintain Your First Alert Smoke Alarm
The following sections provide straightforward instructions on how to quiet the alarm, install it, open it, change the battery, turn it off, and reset it. These steps help you ensure your smoke alarm works correctly and keeps you safe.
What is the First Alert Smoke Alarm?
The First Alert smoke alarm is a popular home safety gadget that detects smoke and notifies inhabitants of fire threats. These smoke alarms quickly detect fire using superior sensing technology. This device warns residents with loud alarms, giving them time to escape and find safety. Some types are networked, so when one alarm detects smoke, other units activate simultaneously, improving the warning system.
First Alert smoke alarms are essential to household fire prevention because of their ingenuity, reliability, and dedication to protecting lives and property.
How do you Silence the First Alert Smoke Alarm?
The general steps to mute a First Alert smoke alarm are:
Step 1. Determine Cause:
Find out why the alarm went off before turning it off. Fire and smoke hazards should be eliminated.
Step 2. The Silence Button:
Most First Alert smoke alarms have a front or side “Silence” button.
Step 3. Press the Silence Button:
Hold the “Silence” button until a brief chirping occurs. This means the alarm is off.
Step 4. Check for Recurring Alarms:
Check the alarm location for smoke or fire. If the alarm keeps going, find out why.
How do you Install the First Alert Smoke Alarm?
Standard battery-powered First Alert smoke alarm installation instructions are as follows:
Step 1. Choose Installation Location:
Since smoke rises, choose a central ceiling or wall location. Avoid corners and vent/window regions.
Step 2. Mounting Bracket Installation:
Screw your smoke alarm’s mounting bracket to the ceiling or wall. Have it securely tied.
Step 3. Insert the battery:
If your smoke alarm is battery-powered, insert the 9-volt battery with the correct polarity.
Step 4. Connect Smoke Alarm to Bracket:
Align and twist the smoke alarm onto the bracket. Some models lock.
Step 5. Test the Alarm:
Press “Test” on the smoke alarm to test its sound. An alarm with a speech prompt should sound a loud siren or message.
How do you open the First Alert Smoke alarm?
Step 1: Find the Battery Compartment
Usually, most of the First Alert smoke alarms have battery compartments installed either on the back or side. A lock is usually used to ensure safe storage.
Step 2: Determine the Locking Mechanism
A You can release the cover to access the battery compartment by either pushing or sliding a latch. Totally removing the cover will take a screwdriver to loosen and remove all these screws.
Step 3: Open the Battery Compartment
After opening the lock, open up the battery compartment. Note that it may fit smoothly when you try to do so or come off completely in the same case due to its unique design.
Step 4: Shut the Battery Compartment
Shut and secure the battery compartment cover. You should test your smoke alarm regularly to ensure it works well.
How to Change the Battery in the First Alert Smoke Alarm?
Step 1: Identify the Battery Compartment
You will have to locate the battery compartment of this smoke alarm, which can either be at its back or sides. The compartment could have a locking mechanism.
Step 2: Release the Locking Mechanism
A locking mechanism may work in different ways depending on the model. It might be a sliding latch, screw, or a hinged cover. To access the battery compartment, you must first free it from its locking mechanism.
Step 3: Open The Battery Compartment
Once the locking mechanism has been deactivated, open up the cover of the battery compartment. Specifically, its design will determine how it should open, either by swinging or sliding off.
Step 4: Insert the New Battery (Only if Necessary)
Insert the new battery into its designated location within this unit and always verify that it has been installed properly regarding polarity. Arrange the positive and negative terminals of the battery with respective indications found inside the boundaries.
Step 5: Close the Battery Compartment
Make sure to close the battery compartment cover tightly and ensure that the lock mechanism is securely latched, holding it firmly in place.
How do you Disable the First Alert Smoke Alarm?
1. Alarms need frequent monitoring to detect any recurring patterns. Observe the location where the alarm was set off to verify that there are no indications of smoke or fire.
2. After you have silenced the alarm, if it persists in emitting those annoying chirping sounds, it may suggest that the battery is running low. Take a moment to inspect the battery and, if required, exchange it for a new one.
3. To help clear any lingering smoke, open windows and doors to ventilate the area if the alarm is triggered by cooking or a non-emergency situation.
4. Temporarily locate the disable or hush feature. You should verify whether your First Alert smoke alarm has a “Hush” or comparable feature.
5. Temporarily disable the alarm by pressing the “Hush” button for a specified time (typically around 8-10 minutes).
How to Reset the First Alert Smoke Alarm?
The steps to Reset a First Alert Smoke Alarm are as follows:
Step 1: Identify the Reset Button
Some First Alert smoke alarms have a dedicated “Reset” button. Find this button either on the front or side of an alarm.
Step 2: Press and Hold the Reset Button
Press and hold the “Reset” button for approximately 10 seconds. Such action is usually taken with the tip of a pencil or small tool.
Step 3: Wait for the Chirping Sound
After keeping the reset button, you can listen briefly to a chirping sound. This means that the reset of the alarm.
Step 4: Test the Alarm
Reset and test to see that the alarm sounds properly by pressing the “Test” button. This step ensures that the alarm operates correctly after resetting.
Conclusion
In summary, the First Alert Smoke Alarm is essential for every household, providing an extra layer of safety and peace of mind. Its advanced technology and easy-to-follow maintenance steps protect your home against the dangers of fire. Remember, regular testing and proper maintenance of your smoke alarm are key to ensuring its effectiveness in an emergency. By understanding and utilizing the First Alert Smoke Alarm, you’re taking a significant step in safeguarding your home and loved ones from potential fire hazards. Stay safe and prepared with the First Alert Smoke Alarm – a small device that greatly impacts your family’s safety.