Getting started with EzloPi and Addressable LEDs:
The EzloPi smart IoT platform is an innovative solution designed to empower users to create and manage smart home and IoT (Internet of Things) projects with ease. It combines hardware, software, and cloud services to provide a comprehensive platform for building connected devices and automation systems.
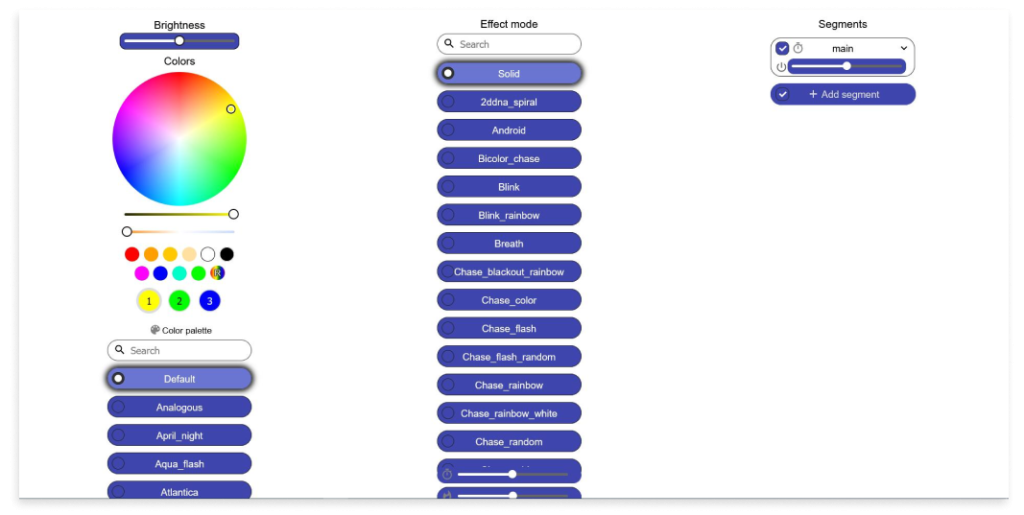
With the integration of the WS2812FX library with around 45 effects and over 60 palettes, opens up a world of dynamic lighting possibilities allowing you to create stunning combinations of lighting effects and displays.
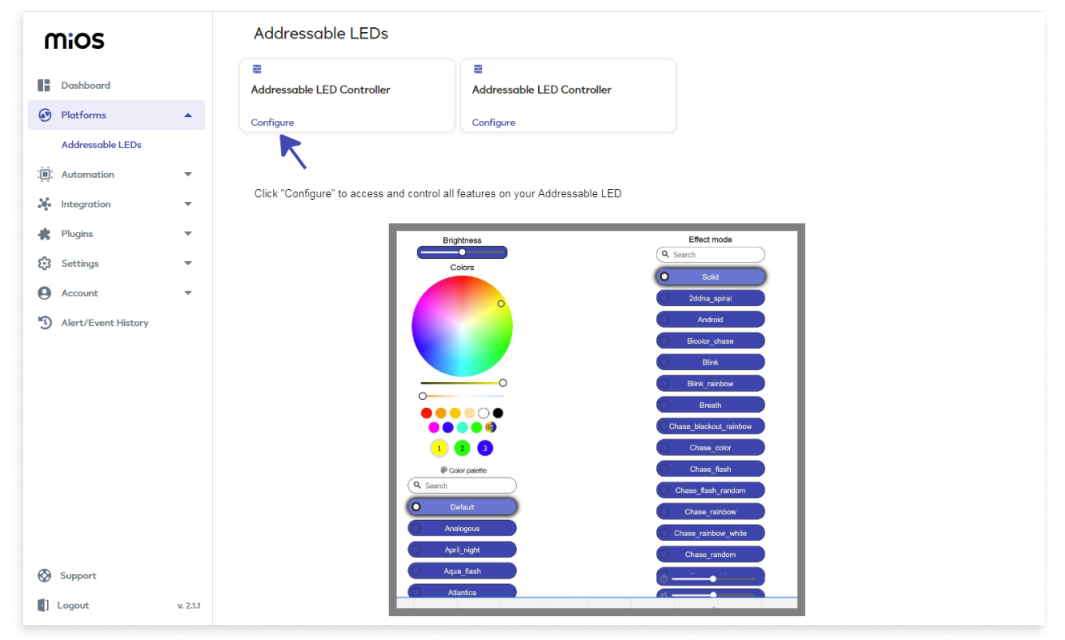
The modern UI provides simple and intuitive controls for color, effects, and segment configurations, allowing you to customize lighting to your preferences. Segments enable setting different effects and colors to various parts of the LEDs, enhancing versatility and ensuring seamless integration cycling through the addressable LED setup with the EzloPi smart IoT platform.
- Modern user interface.
- Controlled wirelessly without the need for physical switches/connections.
- Segments to set different effects and colors to parts of the LEDs.
- Support for RGB strips.
- Suitable for DIY projects.
- EzloPi device (ESP32-based controller board)
- Addressable LED strip (WS2812B, WS2811, SK6812, etc)
- Level shifter module (BSS138)
- 12V to 5V DC-DC Buck Converter (LM2596, etc)
- Power supply for the LED strip (5V/12V)
- Resistor (62 Ohms) (optional)
- Jumper wires
- Breadboard for prototyping (Optional)
Note:
- Ensure that stable output voltages (5V/12V) for both the ESP32 and LED are available.
- When using a level shifter, including a resistor is optional. Additionally, it's worth noting that some LED strips come with an onboard resistor, making its inclusion optional for effective voltage level conversion.
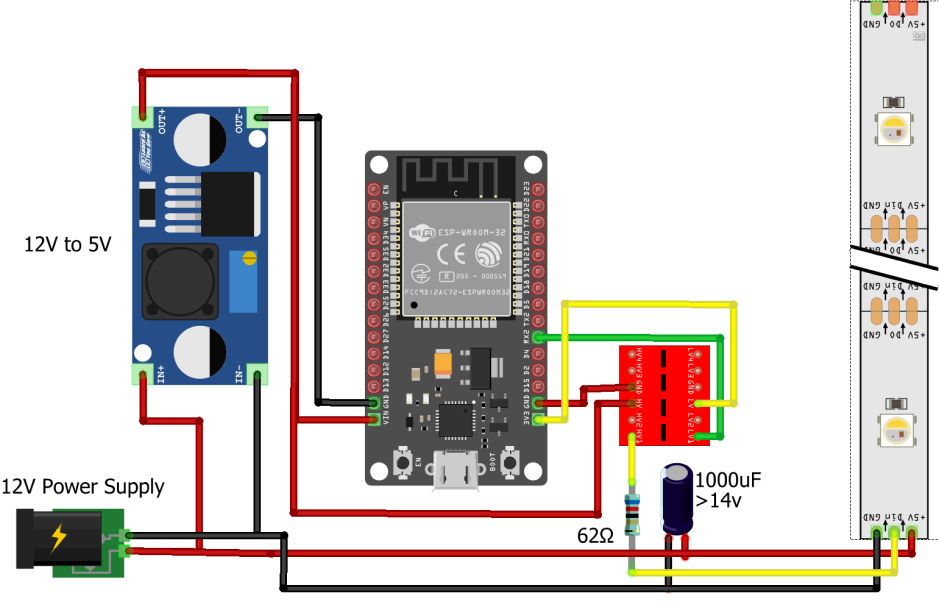
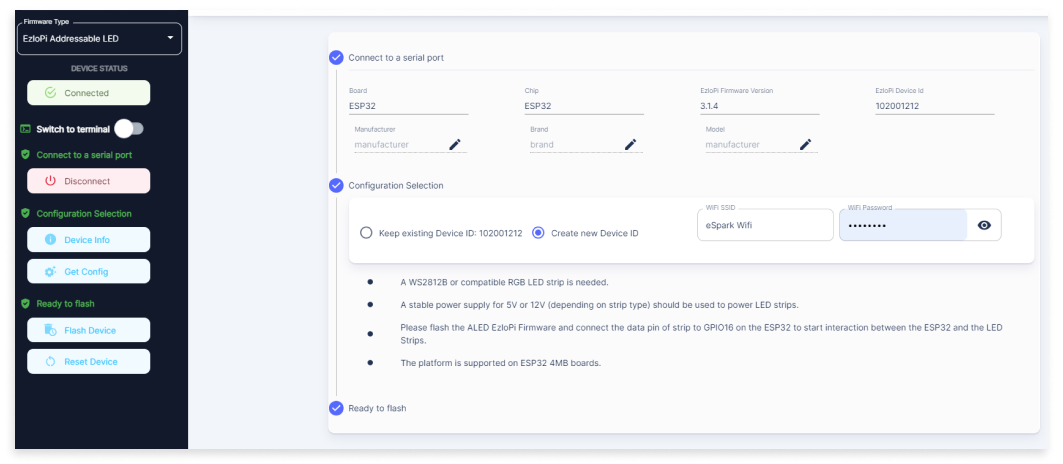
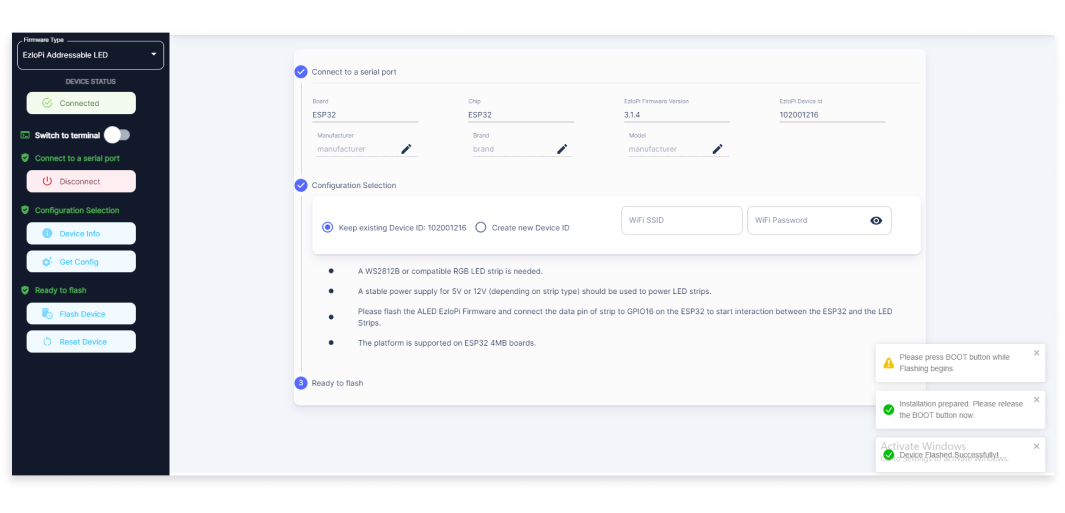
Connect your RGB LED(whether 5V or 12V) strip’s data pin (Din) to RX2 pin (GPIO16) on ESP32 board.
| Addressable LED strip | ESP32 |
|---|---|
| LED Data (Din) | RX2 (GPIO16) |
Following interconnections as shown below are made for interfacing the addressable LED to the EzloPi device:
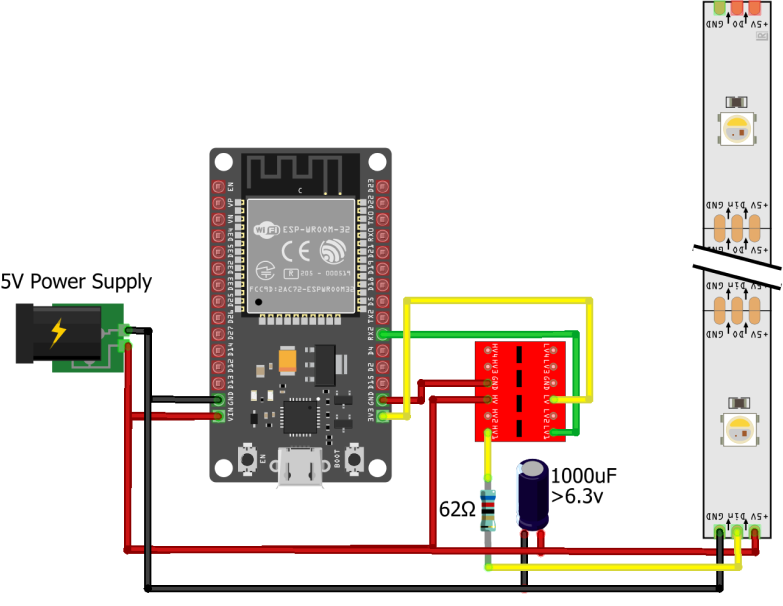
For LEDs with a 12V power source, a step-down/buck converter is used for converting the 12V to 5V. Make sure that the step-down converter 5V output is stable otherwise try adjusting it using the potentiometer if available.
Following interconnections as shown below are made for interfacing the addressable LED to the EzloPi device: